How To Build a Cloche
A cloche is used in the garden in order to create a warm environment for plants. Cloches are made of several different materials, but for the most part I make small cloches over my veg beds in the same way that farms and nurseries use hoop houses. With a little bit of PVC plastic piping, and a length of clear thin plastic sheeting, you can raise the temperature of the air and soil around your plants by 10 to 12 degrees. That is a pretty substantial difference in environment that certain heat loving plants really appreciate.
We do this in the garden in order to set out plants early. In Seattle, for instance, it's not warm enough to sow basil seeds until early June. But if you build a cloche and 'make' it warmer, you can sow your basil seeds in May. I use cloches in Spring, to set out plants early, and in fall, to prolong the season through the early days of winter.
So, how to build a cloche?
You need:
.1 length of 3/4" PVC cut into 10-12" lengths (most PVC comes in 10' lengths, so you'll have 8 to 10 pieces when you're through). You will use these to anchor your cloche
.2 to 4 lengths of 1/2" PVC - these will act as the 'hoops' on your cloche
.3mm clear plastic sheeting
.zip ties to secure the cloche
(Note to all the ladies: PVC is found in the plumbing section of most hardware stores, and the plastic sheeting is in the paint section)
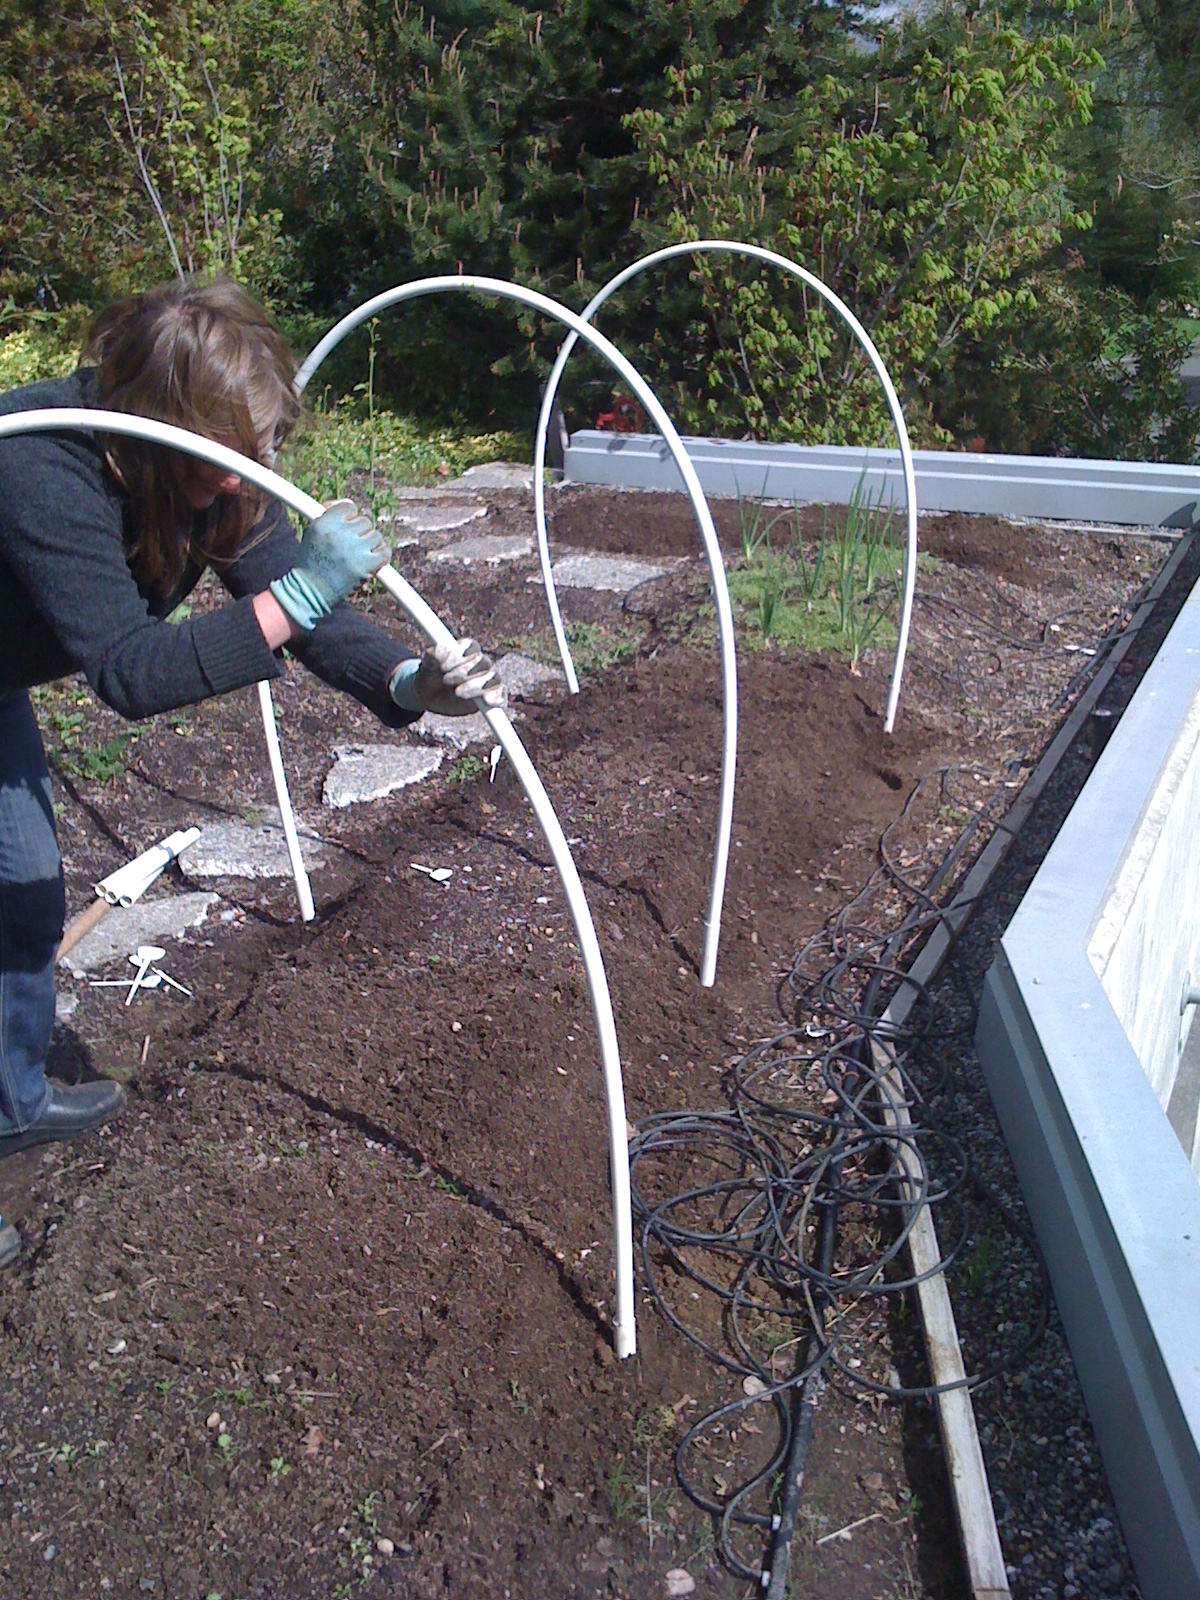
Hammer your 3/4" PVC 'anchors' into each corner of your bed (so, you will use four pieces) until the top of the PVC is just about flush with the soil. Make sure they are secure and firmly in place, as they are the anchors and will act as the main source of support for
the cloche. Add these anchors to the length of the bed, so they are spaced 3 to 4 feet part. Make sure that you mirror your anchors on both sides of your bed so that they line up directly across from eachother. Stretch the 1/2" PVC pipe to fit in the anchors, essentially creating your hoop supports. When you're through, the bed will look like a covered wagon without the canvas.
Anchors in, hoops stretched
From here, you will unfold the clear plastic sheeting over the top of the hoops, running the length of the bed. Leave at least a foot of extra plastic on either end of the bed. Unfold the plastic down and around the sides of your hoops. Essentially, you're blanketing the bed - tucking in the plastic to the edges and make sure it's covered entirely. Now, you have to
secure the plastic sheeting to the hoops so it doesn't blow off. Duh. You can do this several ways. You can use a clip to hold it in place (available at the hardware store), use garbage bag ties, etc. I prefer to use zip ties, as I can leave them a bit loose (as in, don't 'zip' them super snug to the hoop). This allows me to slide the plastic up and down to vent the cloche on really hot days. I pierce the plastic sheeting on either side of the PVC hoop, slide the zip tie through these two holes and zip tie the plastic loosely to the hoop. Voila!
When you're through, your plastic should be reasonably secured to your hoops. Your hoops should be sturdy in their anchors, and you should be able to slide your plastic up and down to water, vent, and access your plants. If you've accomplished all these things, you're money! Questions? Holler back.
A well-vented cloche
(photos courtesy of Carla Saunders. Garden beds are planted and tended for Springhill NW.)


